Ice cream for dinner!! I remember when I was little having that surprise treat and how I wanted to do that for my kids. We’re celebrating the daddys better hours, having him home at dinner time is such a special thing, dinner had to be special! Also it’s summer (national ice cream month) and our oldest is old enough to really enjoy the surprise. She asks me what’s for dinner every night and for months I waited for the day I would say, “ice cream!” It was awesome! She was really confused and said “really but that’s dessert!” (This is the child who recently said she’s totally in love with zucchini right now.) The excitement and the fun of making it was better then actually eating it and we had tons of leftovers but it was a great memory!
When I was planning the ice cream dinner I knew I would make most of the components myself (this was fun meal planning!) the ice cream, sauces, I made 5!, and whipped cream were a given. We’d have assorted candy and a cherry on top is absolutely necessary for a sundae night! I was definitely not buying neon red cherries at the grocery store and I’ve been wanting to make my own sundae cherries for awhile and this made me finally do it.
It seems silly to have candy but then be opposed to something that is basically candy itself but here’s why I don’t like them. They have high frustose corn syrup in them and that’s not allowed, red #40, also not allowed in our food (candy is “tolerated”) and a big one they bleach the cherries white so they will turn that neon red color easier! Why on earth bleach something that is red so you could turn it red?! That sentence doesn’t even make sense. The food industry needs to give us more credit, we don’t buy food based on appearance alone. Anyway, the Wholefoods safer option is $6 a jar I can’t afford that and cherries were on sale this week (yay summer!) so making them myself it is!

I’m really excited about sharing this because I have never found a recipe for them before. There are recipes that use actual maraschino liquor but I didn’t think I should serve those to my kids, I wanted to duplicate the actual ice cream toppers. They’re basically cherries preserved in a simple syrup (sugar and water) so that’s what I did. I looked up the liquor as a reference and it was noted that it doesn’t taste like cherries but like almonds since it’s made from the cherry pits. That didn’t surprise me because did you ever see kernel paste at the grocery store next to the almond paste? Kernel paste is made from ground peach pits. Did you ever buy the kernel paste to use in your pignoli (pine nut) cookies because it was considerably less expensive then the almond paste? And did it not taste much different? So fruit pits taste like almonds! (Now I buy my almond paste from a wearhouse, my husband gets back in the car and I ask “did you get the stuff?” Then he tosses a brown paper bag in my lap. The price feels naughty!) So I added almond extract for that distinct flavor. Cherries and almond is a classic combination makes sense! The cherries have artificial flavors so I knew my version wouldn’t taste exactly like the store bought ones but that’s a good thing. They were more luxurious and still tart and fresh. My husband without even being asked said “if you wanted to copy the cherries you really did it with the flavor” SUCCESS! These are sweet gooey wonderful little gems to top any sundae!

my “dinner” that night. i made everything so it was still a home cooked meal ha!
While making these I was reminded of the “spoon sweets” recipe my husbands aunt gave us that I’ve been meaning to make. That is a Greek treat, usually cherry, that is served to guests who visit. Until then I’ll give our guests a maraschino cherry!
 Maraschino Cherries
Makes a half pint
A cup of pitted cherries stems on
1/2 cup granulated sugar
1/4 cup water plus a teaspoon
1tsp pure Almond extract plus more to taste
1/4 tsp pure Vanilla extract
Directions:
Make sure cherries are all pitted. Leave stems. Put them in a half pint jar packed in. In a small sauce pan add sugar and first 1/4 cup water. Over medium heat dissolve sugar then bring to a boil for a few seconds then turn off hear. Add the extracts. Stir and pour over the cherries. Top off jar with remaining water and stir in as best you can. (I held jar upside down, closed) Store in refrigerator to For 3 days before using. Jar may “pop” but still kept refrigerated. Serve with your favorite ice cream, drinks or eat right out of the jar!
Cooks notes: if the syrup seems thick don’t worry the cherries will make a juice themselves. I kept trying them every day ha! And the best texture was around day 3. I also had to add more almond extract so I increased it in the recipe but if you need to add that’s ok. They were perfect after that. After a week they started changing so they are best eaten soon after making them. I didn’t want to add acidity for shelf life because the cherries are tart already so I wanted them really sweet and they don’t last long due to them yumminess!
I highly recommend a cherry pitter! This is the one I use. Mine is red and this looks updated for the better, I think I got it at a chef store. After pitting 3 pounds of cherries one day, I am an expert it took an hour, you know the pit popped out because there’s a gaping hole. No hole try again! Still check to make sure!

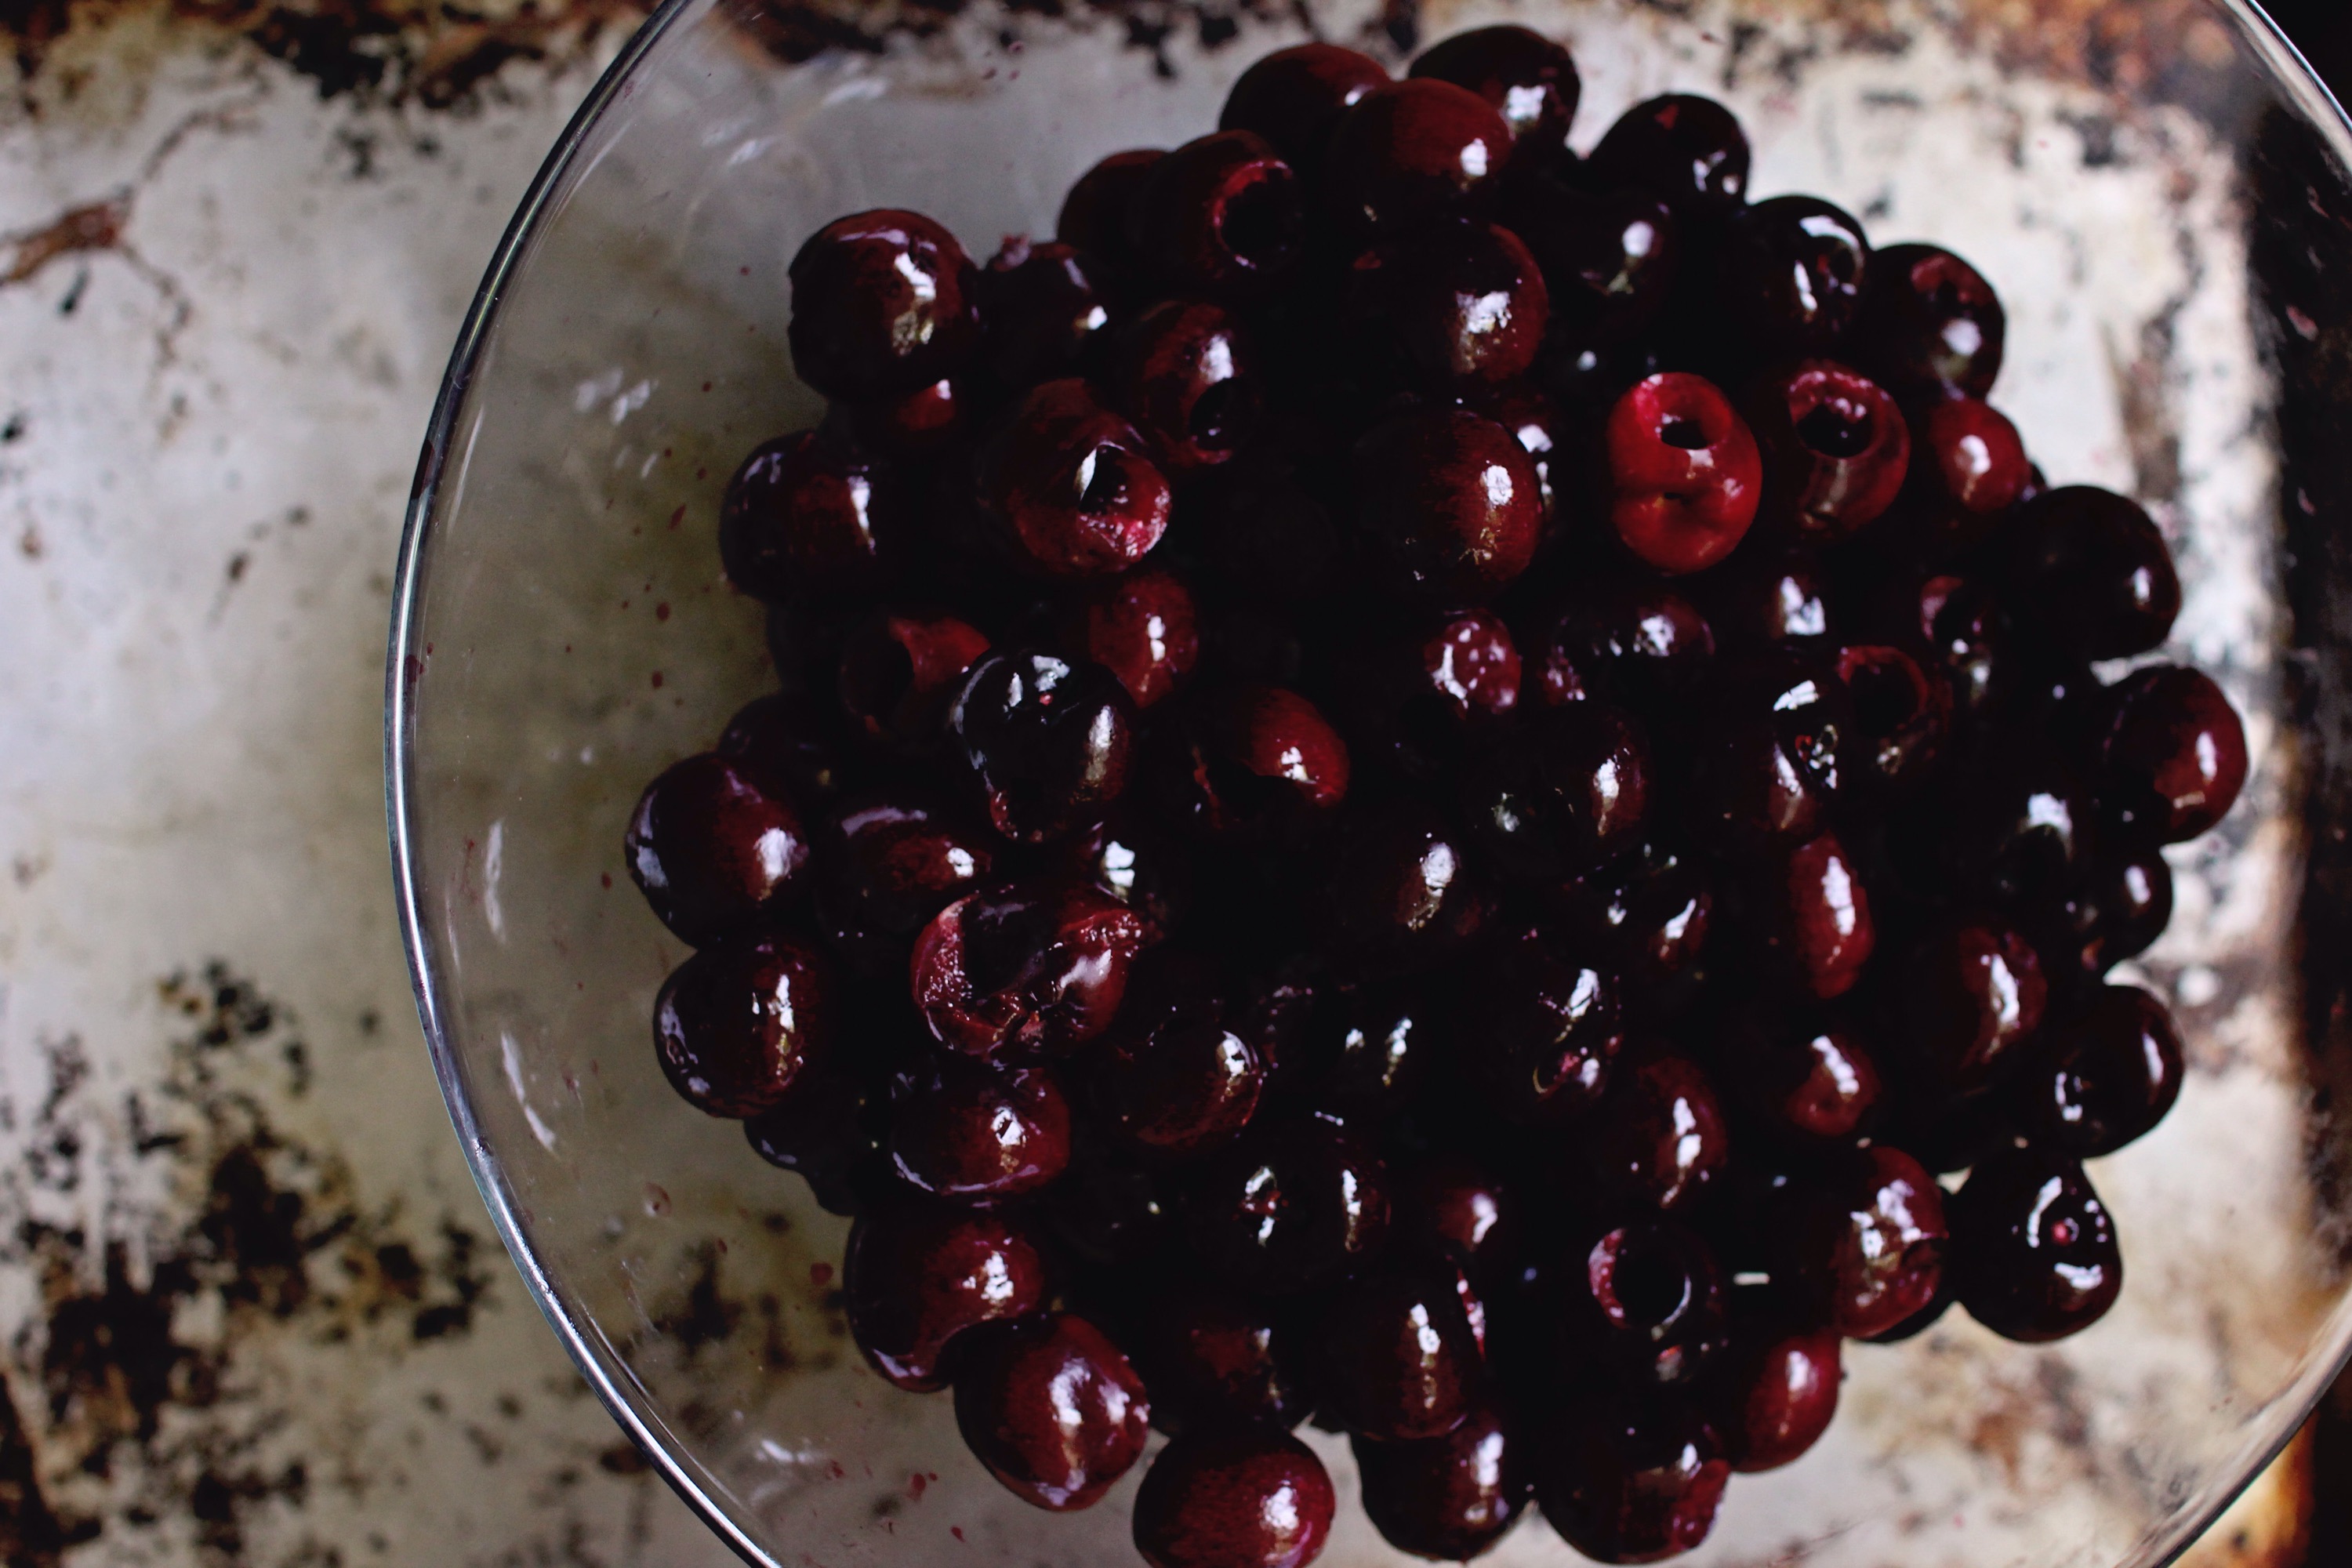
notice the holes, my beauties after an hour of pitting my hands were red!
Update before posting because it takes me 2 weeks to finish a post! So 2 weeks later I’m still enjoying them and although softer the flavor is still there and great!
Recipe by Malina Kalogrides
Enjoy!